2. SkyrimCharacterManager - First Steps
In this topic, we go over the first things that must be done to set up the Skyrim Character Manager, and guide the user through the steps of entering the first character record.
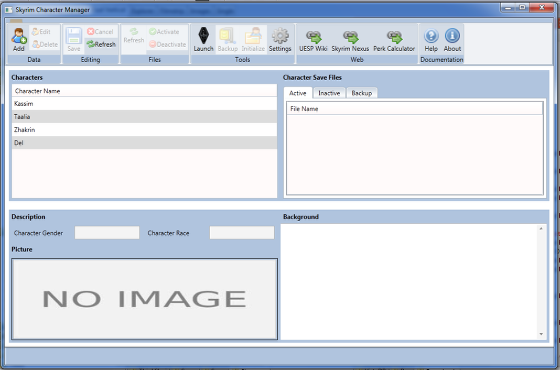
The Skyrim Character Manager Screen
Initial Settings: Part One

The settings button takes you to the settings screen in order to configure the application.
Initial Settings: Part Two
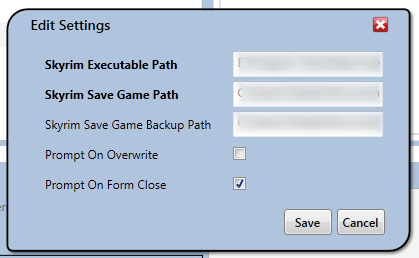
The location where the Skyrim executable is should be specified, along with the Skyrim Save Game path. The backup path is optional, and is somewhere that the backup and restore functions operate from.
To fully explain the screen while it is show, the prompt on overwrite option asks the user every time data is overwritten (it does not apply to backup restores, which always ask if you would like to overwrite, no matter what option is selected here). The prompt on form close option indicates whether exiting of the program should be confirmed.
Adding a Character: Part One

Now that the locations have been set, the first character can be entered. Click the Add button as shown above.
Adding a Character: Part Two
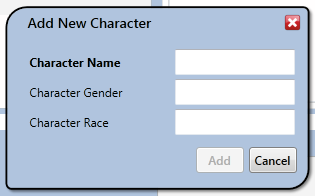
In the add character screen shown, fill out the information regarding the character. The only thing required is the character's name, which must be unique. Click add to add the character.
Adding a Character: Part Three
At this point, the Save and Cancel buttons will be active- click Save to save the newly added character.
Adding a Character: Part Four

Now that the character is in the database, the file system must be initialized. This is best done when the character already has save files in the primary save directory. Select the character, click Initialize, and the character's subdirectory is created in the Skyrim save directory, and the initial character files copied there.