Reference Overlay Tool - 3. Use and Notes
The Reference Overlay Tool was made to do one thing well. As such, there's not a lot to it- but in this lesson, we will go into the functionality.
Main Screen

When first running ImgFloat, a semi transparent surface will be shown. The controls for the application are all clustered in the upper-right hand corner of the application. When an image is displayed, that name will be shown in the upper-left hand corner. And the window can be resized by dragging the lower-right hand corner.
Main Screen - Identified
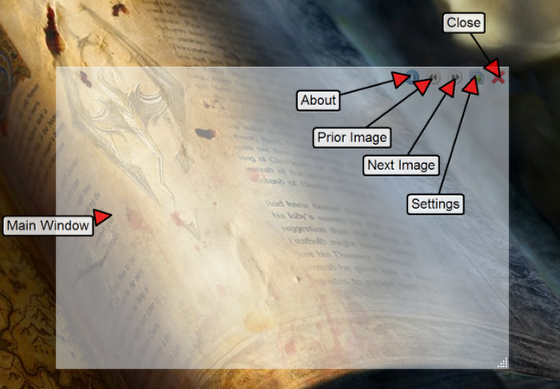
From left to right, in the controls area of the window, you have the about button, which displays the about dialog, the prior image button, which if images are loaded allow you to go the prior image, the next image button, which allows you to go to the next image, the settings button, which displays the settings dialog, and the close button, which closes the application.
Reference Overlay Tool Settings
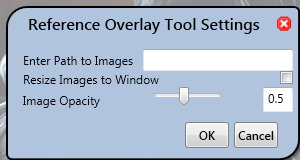
There are a few settings that can be tweaked and saved in Reference Overlay Tool.
- Path to images - this is the fully qualified path to the location where the images you want to be displayed are
- Resize images to window - if checked, the images will be resized to the size of the window, maintaining ratio.
- Image Opacity - a relative measure of how transparent the image is, with 1.0 being completely opaque, and 0.1 being barely visible.
When the OK button is clicked, the changes are saved to the config file, and immediately recognized.
Reference Overlay Tool in Action
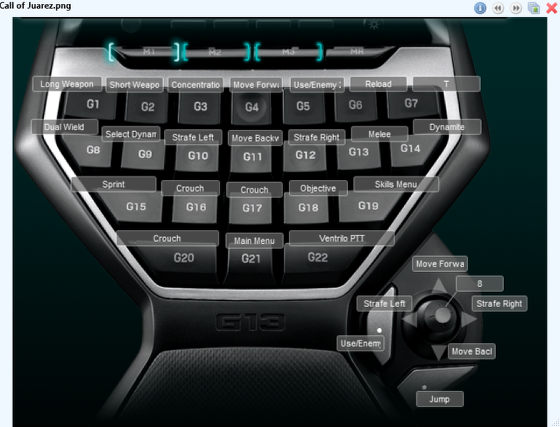
Once the path to the images is set, the Reference Overlay Tool will load the list of images, and show them sequentially as you press the next image/previous image buttons. It will cycle through the images at the end/beginning of the list.